
The 1-Hour Tote Bag Project

The 1-Hour Tote Bag
Beginner sewists take note – you can make this great-looking unlined tote bag in about an hour. If you’ve been wanting to sew, but not sure how to get started, this tote bag is for you, promise! Our sewing tutorial is easy to follow and will build your confidence using some basic sewing tools and techniques that you can apply to other projects as you develop your sewing skills.
Supply List
- ½ YD of Fabric – Canvas or Duck Cloth
- Dritz 1” Belting – 1 to 3 YD
- Dritz Ezy-Hem® Gauge
- Dritz Mark-B-Gone® Marking Pen
- Dritz Point Turner
- Dritz Sewing Gauge
- Dritz Jean-a-ma-jig™ (optional)
- Dritz Fray Check® (optional)
- Omnigrid 6”x 24” Ruler
- Omnigrid 18” x 24” Cutting Mat
- Omnigrid 45mm Rotary Cutter
- Straight Pins
- Lighter or Candle
- Iron and Pressing Surface
- Sewing Machine and Thread

Step 1: Prepare your fabric. Use the ruler, cutting mat and rotary cutter to cut two pieces of canvas 14” wide x 16” long.

Step 2: Press the top hem on each piece of fabric. Press ½” to the wrong side first. Fold a second time and press a 1” hem. The Ezy-Hem® Gauge makes this step quick and easy.

Step 3: Prepare the belting. Cut two 18” lengths of belting and seal the ends with a quick pass through a flame. This will prevent the ends from raveling. Don’t melt the belting too much or it will form a thick bead. Fray Check can be used to seal belting if preferred.

Step 4: Attach belting to fabric. On each fabric piece, open top hem. Position belting ends even with hem edge and 3-1/2” in from each side. Use an Omnigrid ruler to help position belting. Make sure the belting is not twisted and pin in place. Baste belting ends at ½” crease.

Step 5: Pin pieces right side together making sure 1” creases are matched up. (Mark crease with marking pen to help line them up.)
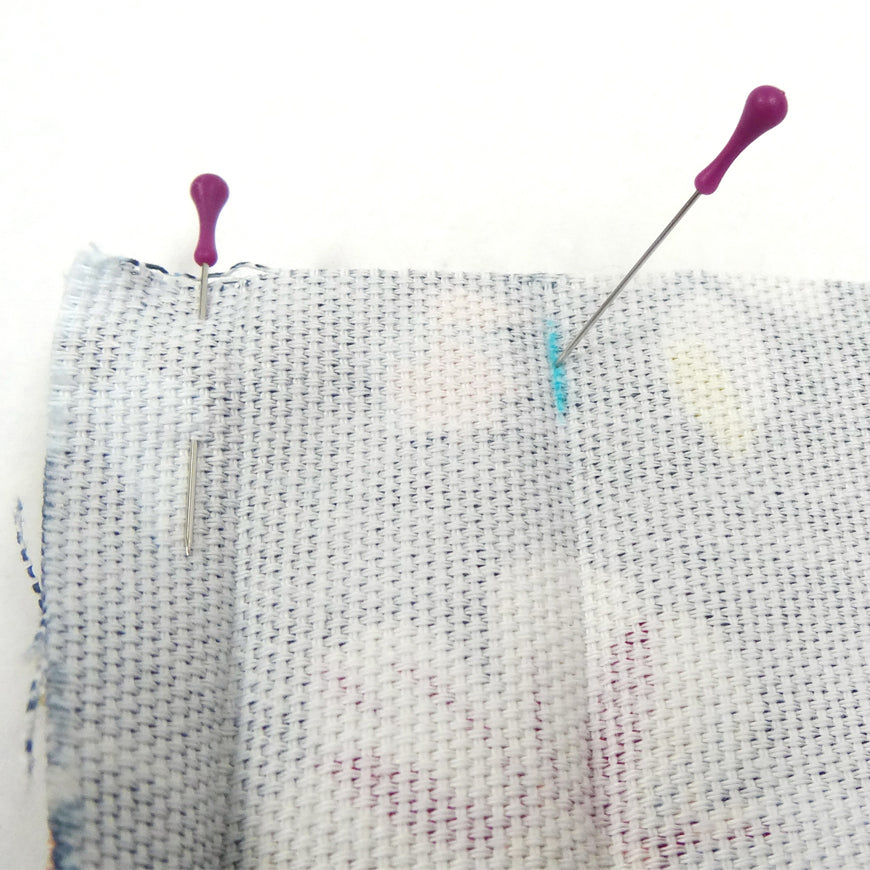
Step 6: Stitch along sides and bottom with ½” seam allowance. Pivot at corners. Tip: to help pivot at the right spot, mark ½” in from sides and bottom at corners. Pivot stitching where the marks intersect.

Step 7: Trim corners. Zigzag stitch or serge raw edges of seam allowances together. Turn tote right side out and press. Use a point turner to help press out the corners.

Step 8: Eliminate bulk in the top hem. Clip seam allowances at 1” crease. Fold seam allowances in opposite directions when closing hem.

Step 9: Fold top hem along creases with handles down and inside of tote. Stitch hem without catching loose handles. Optional: you can use a Jean-a-ma-jig to help stitch over the seam bumps.

Step 10: Fold handles up and pin in place. Stitch along top edge of tote catching handles in stitching.

Step 11: Reinforce those handles. Stitch an “X” over the handles in the top hem.

Step 12: You’ve made a basic tote bag!

And that’s a wrap! If you enjoyed making this bag, the good news is that you can never have too many. Mix up your fabric and belting choices and create a variety of looks to go with favorite outfits, to celebrate different seasons or to serve a specific need (like a gym or beach bag).
Once you’ve sharpened your basic bag-making skills, take it up a notch by playing with hardware and design details and really challenge your creativity.
Shop The Project


More Inspiration

Fabric Wall Organizer

Laptop Sleeve

Strawberry Gingham Pajama Set

Apple Garland

Pencil Bow Door Hanger
Create a cheerful pencil bow door hanger with this fun DIY craft project. Featuring a colorful school-inspired design, it makes a playful decoration for classrooms, teacher gifts, back-to-school displays, or study spaces.

Stuffed Crab Toy
Sew a charming stuffed crab plush toy with this creative ocean-themed project. Its soft shape and playful details make it a fun handmade gift, beach house decoration or cuddly companion for little beach and sea-life fans.

Fish Drawstring Bag
Get nautical with the fish drawstring bag! Whether you're planning a beach trip, going to the pool, or just love fish, this is the perfect DIY for you. This beginner-friendly project is fun for all ages. Add a whimsical touch to your bag collection and enjoy this fun summer project.
